
Sticker Cutting · Materials · Artwork Preparation
A die-cut sticker follows the contour of the artwork instead of being limited to a standard square or rectangular shape.
Circles, logos, bottles, animals, product silhouettes and irregular graphics can all become custom-shaped stickers. However, successful die cutting depends on more than the artwork shape. The face material, adhesive, liner, cutting method, corner radius, bleed, registration and waste-removal design all influence the finished result.
Quick Answer: What Is a Die-Cut Sticker?
A die-cut sticker is a sticker cut to a specific shape defined by a cutting path rather than simply trimmed as a square or rectangle. In everyday sticker terminology, “die cut” often describes a sticker whose final backing follows the custom shape, while a kiss-cut sticker usually remains inside a larger backing sheet or liner. In professional roll-label converting, however, the term “die cutting” can also describe kiss cutting the face stock while leaving the release liner intact.
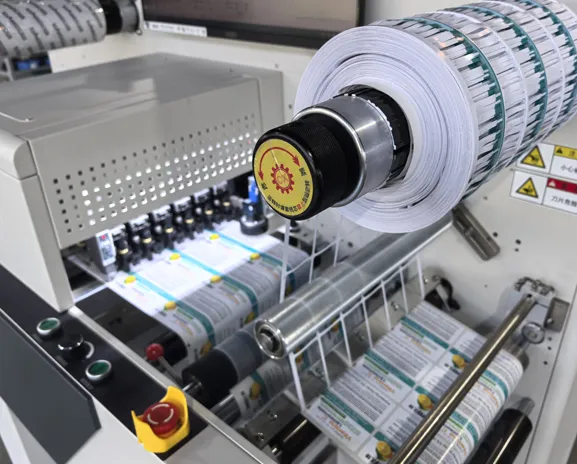
Roll-fed stickers being converted on digital label die-cutting equipment. Cutting accuracy, liner condition and matrix removal all affect the final result.
Die-cut stickers are custom-shaped stickers produced by following a defined cutting contour around printed artwork. Instead of receiving a rectangular sticker with unused material surrounding the graphic, the converted sticker can follow the outline of a logo, product, character, icon or other design.
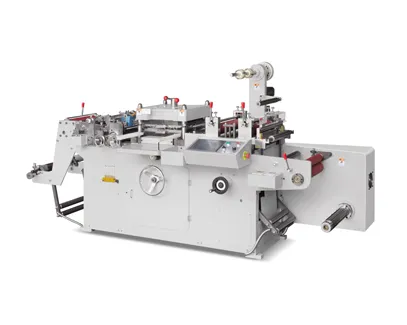
The name originally comes from conventional die cutting, where a manufactured cutting die physically cuts the required shape. Modern digital label die cutters can instead follow a digital contour file, allowing label converters to change sticker shapes without making a separate conventional die for every new design.
This makes digital cutting particularly useful for prototypes, short runs, personalized stickers, promotional campaigns and production environments with many SKUs.
Before discussing die cutting, it helps to understand the structure of a pressure-sensitive sticker. A typical construction contains three key components.
Avery Dennison's pressure-sensitive label component guide likewise identifies facestock, adhesive and liner as the three fundamental components of pressure-sensitive label material. This matters because changing any one of these components can change cutting and matrix-stripping behavior.
These two terms are often confused because both can produce a sticker with the same visible custom shape. The main difference is usually what happens to the surrounding backing material.
| Comparison | Die-Cut Sticker | Kiss-Cut Sticker |
|---|---|---|
| Finished appearance | Backing commonly follows the custom sticker shape | Sticker shape is cut while a larger backing remains |
| Cutting depth | May require cutting through the complete construction for individual pieces | Face material and adhesive are cut while the liner remains usable |
| Peeling | Depends on final backing shape and design | Larger liner area can make the sticker easier to peel |
| Typical use | Individual promotional stickers and custom-shaped pieces | Sticker sheets, roll labels and easy-peel promotional stickers |
| Waste removal | Depends on production format | Roll production commonly removes the surrounding matrix |
Important terminology note: In commercial label converting, “die cutting” does not always mean cutting completely through the liner. A roll-label die-cutting machine commonly performs a controlled kiss cut through the face material while preserving the release liner. Therefore, always specify the required finished format instead of relying on the term “die cut” alone.
Die-cut stickers can be produced from many paper and filmic materials, but the exact cutting settings must be matched to the complete material construction.
Popular for indoor product labels, packaging stickers and economical promotional applications. Paper is generally easy to convert but moisture and abrasion resistance depend on the grade and coating.
Common for food, beverage, personal-care and household labels where moisture resistance and a filmic appearance are useful. Thin films require accurate cutting-depth control.
Selected where dimensional stability, durability or specialized performance is needed. PET constructions can vary significantly in thickness and liner combination.
Useful for durable graphics and selected promotional applications. Flexible or specialty films should be tested because face thickness, adhesive and backing strongly affect cutting performance.
Do not choose cutting settings based only on the word “paper,” “BOPP” or “vinyl.” Two apparently similar sticker stocks can use different liners, adhesives and coatings. The safest method is to test the exact material planned for production.
Digital cutting makes custom shapes practical, but not every contour has the same production difficulty.
| Shape Characteristic | Typical Cutting Behavior | Artwork Advice |
|---|---|---|
| Circles and rounded rectangles | Usually straightforward | Maintain a clean continuous contour |
| Smooth irregular shapes | Well suited to digital cutting | Reduce unnecessary anchor points |
| Very sharp corners | More demanding during cutting and matrix stripping | Use a practical corner radius where the design allows |
| Thin projections | Can lift, tear or make waste stripping unstable | Avoid extremely narrow points when possible |
| Closely spaced labels | Can create a weak matrix between labels | Leave enough matrix width for reliable stripping |
Good cutting starts before the roll reaches the finishing machine. The artwork file should clearly separate printed graphics from the cutting path.
1. Create a Separate Cutting Contour
The cutter needs a clean vector path defining the final sticker shape. Avoid using the visual edge of a raster image as the only reference. The production file should make it obvious which path is intended for cutting.
2. Add Bleed Outside the Cut Line
Artwork intended to print to the edge should extend past the final cutting contour. This prevents a small registration variation from revealing an unwanted white edge. Follow the bleed dimension requested by the printer or converter rather than assuming one universal value.
3. Keep Important Content Inside a Safe Area
Logos, small text, QR codes and important design elements should not sit directly against the cutting contour. Leave a practical safety margin appropriate for the size and registration tolerance of the job.
4. Simplify Unnecessary Nodes
Hundreds of unnecessary anchor points can create an inefficient cutting path. Smooth vector contours usually allow cleaner and more efficient machine movement.
5. Confirm Fonts, Images and Output Files
Confirm image resolution, linked graphics, fonts, color mode and the file format requested by the printing and finishing workflow. When required, convert fonts appropriately or package the necessary font information before sending production files.
Adobe's official Illustrator guide to printer's marks and bleed explains how artwork can extend beyond the final trim area so printed graphics still reach the finished edge after cutting.
Basic Die-Cut Artwork Structure
BLEED AREA
Printed background extends beyond the final cut
CUT PATH
Final sticker contour
SAFE DESIGN AREA
Keep important text and graphics here
A digital label cutting workflow replaces a fixed conventional cutting die with cutting data supplied through a digital file.
STEP 1
Load Printed Roll
STEP 2
Import Cut File
STEP 3
Register Print Position
STEP 4
Follow Cutting Path
STEP 5
Remove Matrix & Finish
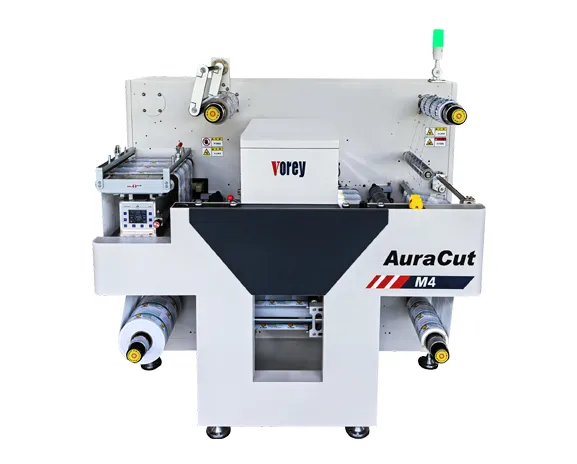
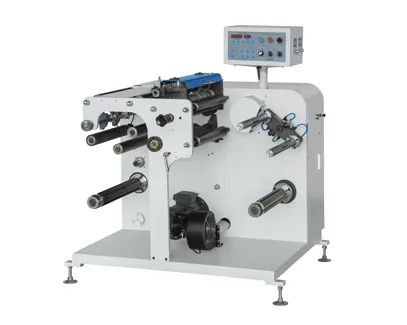
VOREY AuraCut M4 digital label die cutter integrates digital cutting with common roll-label finishing functions such as lamination, waste removal, slitting and rewinding.
For converters handling multiple custom sticker designs, equipment such as the AuraCut M4 digital label die cutter can process changing cutting files without requiring a separate conventional die for every sticker shape.
Cutting the contour successfully is only part of the job. After kiss cutting a roll of pressure-sensitive labels, the surrounding unwanted face material normally needs to be stripped away. This waste material is called the matrix.
Matrix stripping can become difficult when the design contains:
Very sharp internal or external corners
Extremely narrow spaces between adjacent stickers
Thin film facestocks
Aggressive adhesives
Weak release liners
Excessive cutting depth that damages the liner
Production tip: A sticker that looks easy to cut is not necessarily easy to strip. Always test both cutting quality and continuous matrix removal before approving production settings.
| Production Factor | Digital Cutting | Conventional Die Cutting |
|---|---|---|
| Dedicated cutting die | Not normally required | Required for each geometry |
| Shape changes | Change digital cutting file | May require another physical die |
| Short runs | Strong fit where designs change frequently | Die preparation can represent a larger share of job cost |
| Repeated long runs | Depends on shape and required output | Conventional tooling can remain highly efficient |
| Prototypes and samples | Easy to change without manufacturing new tooling | Less attractive when every prototype needs new tooling |
Brand & Logo Stickers
Custom contours can follow logos and brand symbols without an unnecessary rectangular border.
Product Labels
Unique shapes help packaging stand out while fitting specific bottles, jars and containers.
Promotional Stickers
Short-run campaigns often require changing shapes, graphics and quantities.
Personalized Products
Digital printing and cutting can support multiple artwork versions in relatively small batches.
Before approving a production job, test more than cutting accuracy alone.
Cut-to-print registration around the complete contour
Cutting depth through the face material
Liner damage after kiss cutting
Matrix stripping at production speed
Sharp corners and narrow details
Adhesive edge behavior
Slitting and finished roll quality
Actual production speed with the real artwork
It means the sticker is cut according to a defined shape or contour rather than simply being supplied as a standard square or rectangle.
In common sticker terminology, a die-cut sticker often has backing that follows the sticker shape, while a kiss-cut sticker is cut through the face material but remains on a larger liner or backing. In roll-label production, die cutting commonly refers to the process used to create that controlled kiss cut.
No dedicated conventional cutting die is normally required. Digital blade or laser systems follow cutting information from a digital file, although blade-based systems still use replaceable cutting blades.
Yes. BOPP and other PP films are commonly converted into pressure-sensitive labels and stickers. The exact film, adhesive and release liner should be tested together because different constructions require different cutting settings.
Bleed extends the printed artwork beyond the intended cutting contour. If small registration variations occur during printing or cutting, the extra printed area helps prevent an unwanted unprinted edge from appearing.
Narrow projections, acute corners and very small gaps can make cutting and waste stripping less stable. Slightly simplifying the contour can improve production reliability without noticeably changing the appearance.
Send the actual printed or printable material, including its adhesive and release liner, together with the artwork and cutting file. Include your smallest sticker, most complex shape, narrowest matrix area and target production speed.
A good die-cut sticker is not simply a printed graphic with an unusual shape. Reliable production requires the artwork, facestock, adhesive, liner, cutting path, cutting depth, registration and matrix design to work together.
For short runs and frequently changing shapes, digital die cutting removes the need to manufacture a dedicated conventional die for every new sticker design. The best way to determine whether a job is suitable is to test the actual material and artwork under realistic production conditions.
Send VOREY your sticker material, roll width, artwork, cutting contour, finished label size and expected production volume. The team can review the job and arrange a cutting test before you select a digital label die-cutting system.
Request a Sticker Cutting Test

 0574-87476008
 English